3D Printed Simple Prosthesis
Original Design
I designed and produced a rudimentary peg-leg style prosthesis for the left forelimb of a cat. The design can easily be modified for an animal of a different size. I have attached the files that I made on Solidworks 2019 at the bottom of this page. These include the parts for the leg of the prosthesis, a support piece that sits on the upper arm, and the pins to hold it together. The parts were printed using FDM nylon-12.
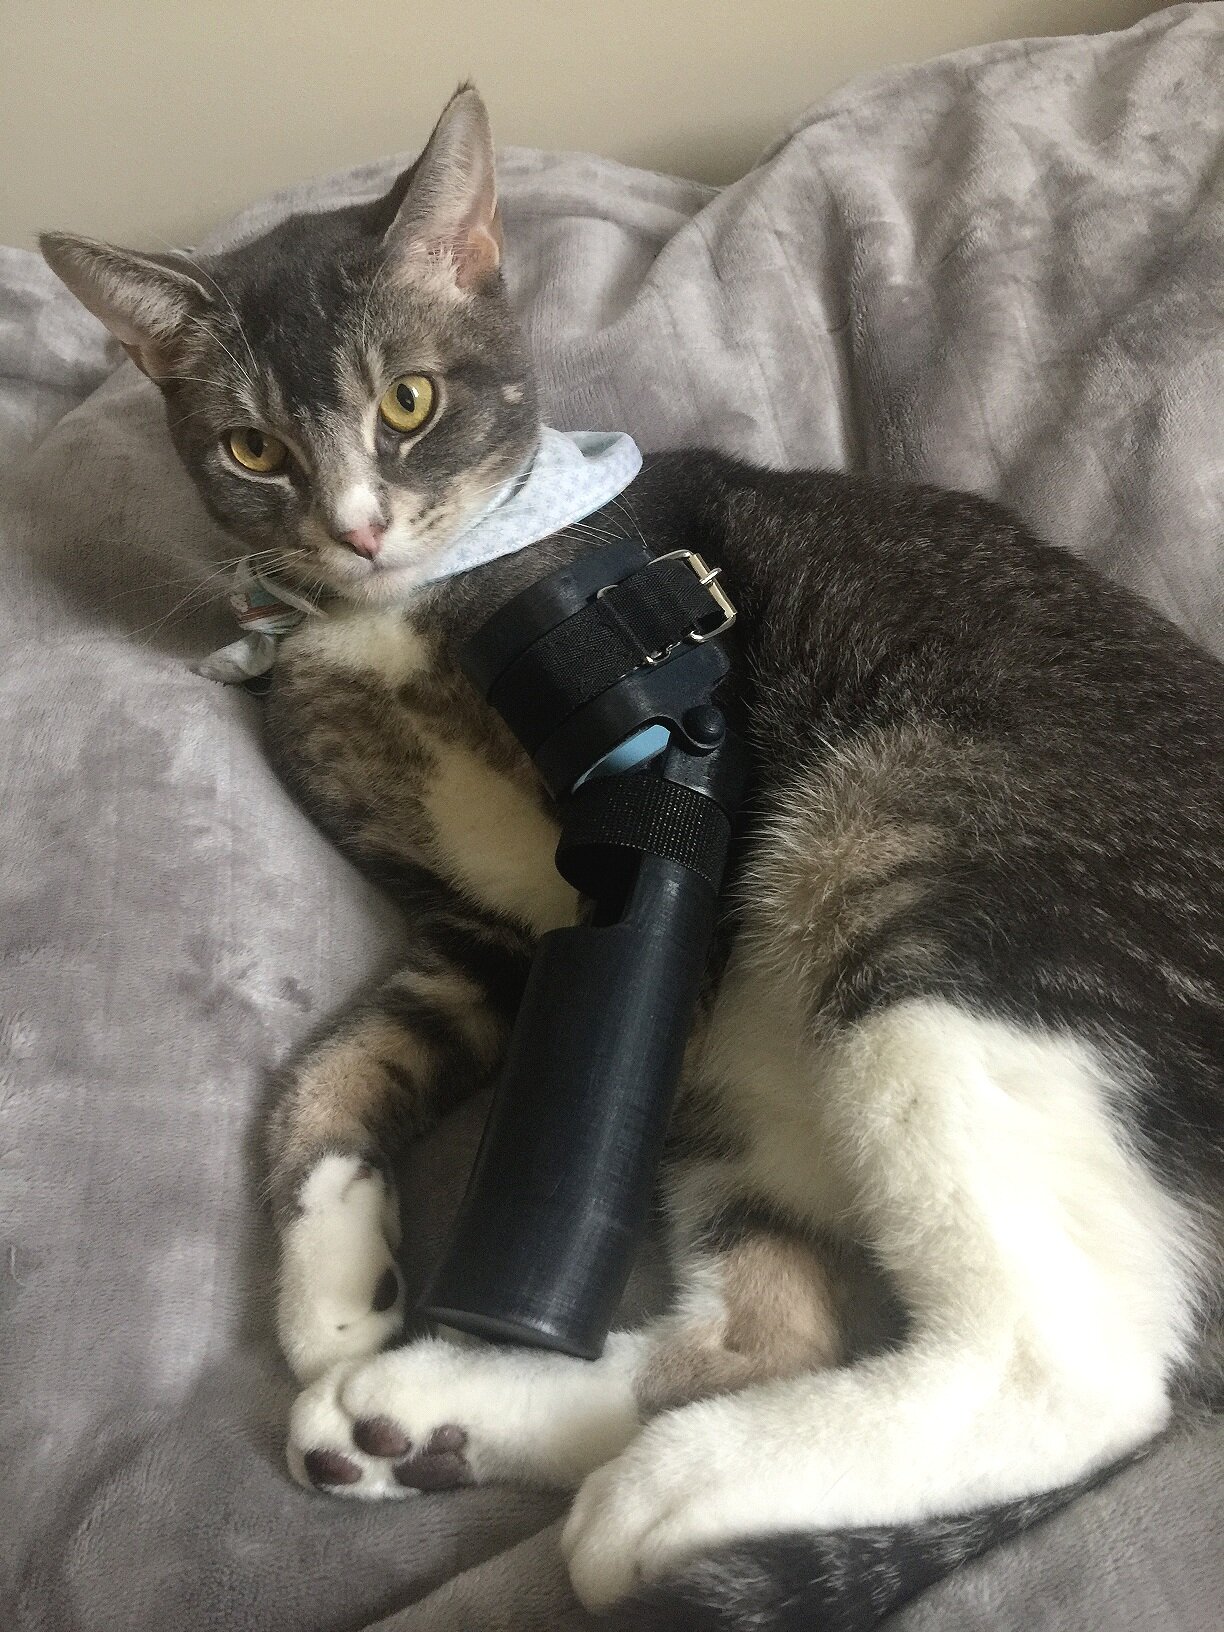
After printing the pieces, the assembly process was very simple. Before assembling the pieces, line the interiors of the leg and the support pieces with foam. I secured the foam in place with a strong bonding glue. The type of foam (thickness and density) will depend upon the animal and its stump that you are producing this for.
The support piece sits on the outside of the leg piece with the holes lining up perfectly. From the inside, slip in the pin base through both pieces so that the base sits flush into the nook on the inside of the leg and extends out of the support piece. Do so for both pins. For my print, I glued the pin base to the inside nook for extra security. Then, simply attach the pin cap to the outsides of the pin. I also glued the pin caps in place to the pin base, making sure not to accidentally glue them to the support piece.
Finally, I attached a nylon strap and metal buckle on the support piece and self-adhering Velcro on the leg piece. Both of these straps should sit flush into their respective nooks.
Modifications to the Design
If you were to reproduce this prosthesis using my files, the following are some suggestions that I would make to improve the structure and integrity of the design:
The wall thickness of the upper support and leg portion is unnecessarily thick, causing the prosthesis to overall be chunkier than it needs to be. I would decrease the wall thicknesses to approximately 3mm.
For the support piece, I would alter the shape of the side that sits under the armpit to curve in a way that is more comfortable for the animal. The wall thickness of this piece should also be decreased.
To ensure the security of the assembly, I would swap out the pins I produced for metal pins or a metal screw and bolts of the same size.
The leg piece can be shortened and a rounded rubber base can be added for shock absorbance as well as better ease of movement. This will have to be replaced with use so make sure to keep an eye on wear over time.
The nylon strap and metal buckle can be swapped out for a Velcro strap for ease of use. The self-adhering Velcro is also nice because any excess strap length will adhere to itself, leaving no trailing tail that they can get caught on. This also makes it harder for the animal to remove the prosthesis if they were to try.
I’d love to hear your experience and see your results if you decide to use this design. Shoot me an email if you do!